Month: July 2020

Get Organized! Week Four

It’s Time to Get Organized!   We get what seems like a million pieces of paper each year.   It’s easy to get overwhelmed by the piles of paperwork on the counter.    And if one of those pieces is a bill or a tax document, sometimes its out of sight, out of mind.  It can be easy to accidentally miss the due date.    

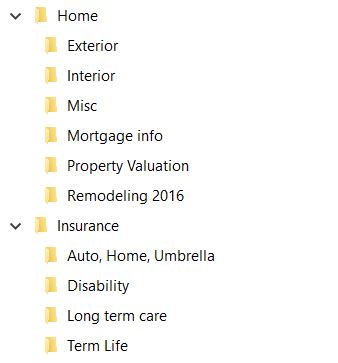
This post is week four out of six of sharing financial organizing tips.   Continue reading to see my method to process bills and paperwork.  Although I have automated many of my bills, such as mortgage payment, electric and gas bills, insurance premiums and giving to my church,  there are some bills that I still want to see every month like credit card bills and loan statements.   This is a photo of my family room bookshelf.   You should know; it was much messier before I took the picture!

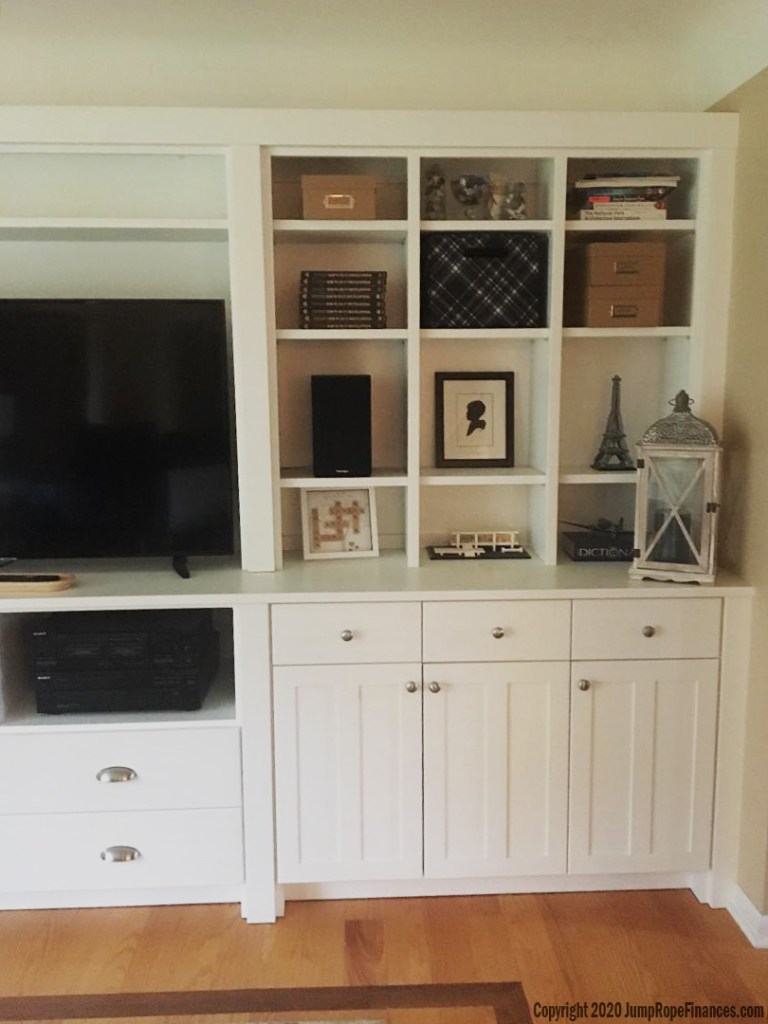
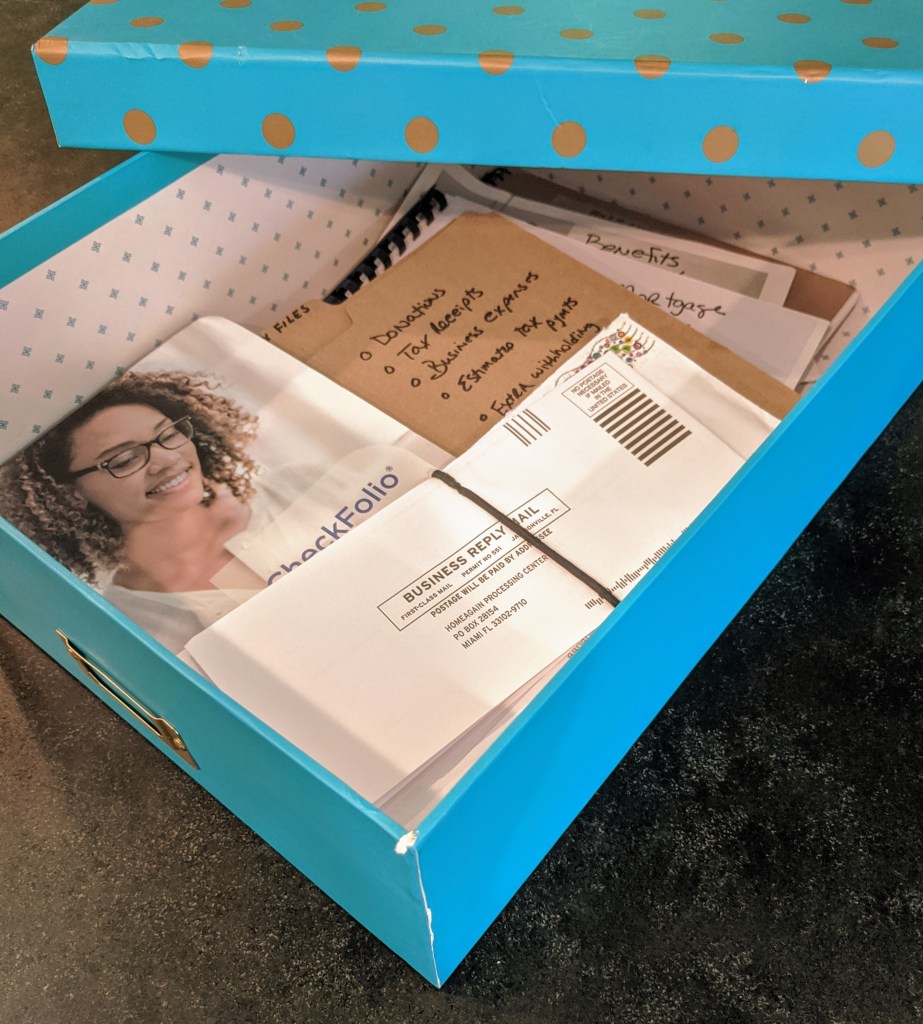
Do you see the black and white box in the middle near the top?  It’s actually a file box where I store my incoming bills and important paperwork.    When I get bills in the mail, or anything that requires a check (a school form, a tax bill, a registration) and I don’t have time to deal with it, it goes in the box.   When I am ready to sit down and pay a bill or fill out the form, I grab the whole box and take it to my kitchen counter. 

The box is a Thirty-One Fold N’ File box that I bought at a resale shop. If you want a fold n’ file box like this one, reach out to a thirty-one consultant or check out ebay or Mercari where they sell for about $15 to $25 and come in a variety of patterns.   The box size is approximately 12 X 10 X 7.  Alternately, you can use pretty rattan basket, or seagrass basket or this gray foldable basket.  I also like Marshalls or Target for organizing supplies.    

I just toss the bills in the box when received.   You could create file folders too, but I found that it is just easier to toss them in and be done with it.  The box is simply a temporary holding place for items I need to deal with, to write a check, or complete a form or registration.  It is not a long-term storage file.   I look through it once or twice a month.   

One side of the box is flat and the other has two mesh pockets on the outside.In the pockets I keep blank envelopes, stamps, address labels and a few pens. You could also keep your checkbook here if you still write checks.    When I put this on the shelf in my living room, I turn this side towards the wall.   If you have a box without the outside pockets, just rubber band the supplies together and toss inside the box with your bills.  Or use a plastic pencil case and toss on top.  Target has these pencil boxes for about a dollar each.

Although I have automated most of my bills, there are some that I receive monthly because I want to keep track and review them.   I have found that if I receive them online, I don’t always look at them with close scrutiny.    While online might be fine for the monthly electric bill that doesn’t change much, I do want to see the Target bill and the VISA statement to review my purchases every month.     My mortgage payment is made automatically, but I also receive a paper copy in the mail because I like to keep an eye on the outstanding balance.   One day we will own our house free and clear!  

Once my bills are paid, I toss them into a white Ikea box, in a nearby closet that I’ve turned into a mini office (a future post!). 

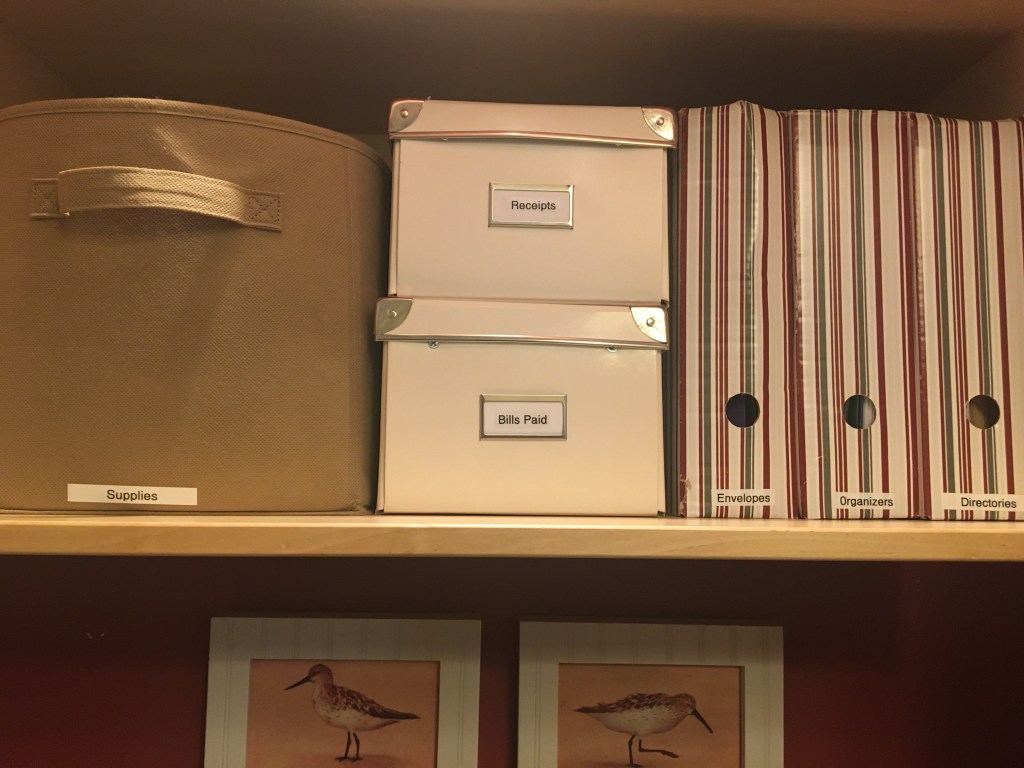
At one time, I filed everything in file folders by vendor (Phone Company, Electric, Gas, Cable) but that took much time.   Next, I tried file folders by month and lumped all together (Jan 2020, Feb 2020 etc.), but I found I rarely went back through them and file folders were jammed in file cabinets.   Now I just rubber-band each month’s paid bills together and write the month and year on the top bill with a sharpie, open the box and toss them in.  It’s kind of organized in that the last month’s items are always near the top.  Since so much is paid automatically, I really don’t have a lot of bills in this box and it usually lasts one or two years before it is full.   If I need to reference a paid bill, I pull down the box and shuffle through the rubber banded groups to find the monthly batch.   Simple and works for me!   

Much like life, things are always changing and what works today, may not work down the road.    So, if you try something and it’s not working, find another method.   

Disclosure:  If you purchase anything from links in this post or any other Jump Rope Finances blog post, I may receive an affiliate commission.  However, I only mention products I love and would recommend whether I was being compensated or not.   Thank you so much for your support of Jump Rope Finances. 

If you liked this post, please share and subscribe. 

Get Organized! Week Three

It’s Time to Get Organized! Keep copies of financial documents and spreadsheets electronically organized on your computer for quick reference.  In less than an hour you can set up an organized electronic filing system with this quick guide. 

Although I love my financial binder for a quick file reference, I keep many files electronically.    On my computer, I have a main master file folder called FINANCES where I have about 12 to 15 subfolders that help organize my financial documents.   Every file that is financially oriented goes into one of the subfolders in the master FINANCE folder.   Below is a quick snapshot of my FINANCE folder with all the subfolders.     

STEP 1:  Create a master folder called FINANCES  

STEP 2:  Create subfolders under the FINANCES folder to store your documents  

STEP 3:  Move all your financial documents into the appropriate subfolders 

Note there are no actual documents in the FINANCES folder – keep everything in a file subfolder within the FINANCES master folder to keep the master folder clean and organized.   In making subfolders, you won’t get overwhelmed trying to find files or trying to remember what the document contains without opening each document.  

Some examples of items to keep in the subfolders are loan agreements, payment records, monthly or quarterly reports, amortization schedules, maintenance records, purchase records, tax files, etc.   In some folders, you can have additional file subfolders.   For example, in TAX FILES, there are individual folders for each year.     

In the subfolder labeled 2020 store anything that is relevant only to year 2020.  For example:  monthly bills that are paid electronically, credit card statements, net worth statements, an electronic check register for the year.   These are files you may not need to reference on a regular basis beyond year 2020.     

On the other hand, if you need to access certain files in the future, such as a home improvement schedule or receipt,  you don’t want to be spending time trying to remember which year you purchased or repaired something, so instead put this type of data in the HOME file folder.   Within the HOME file, you can have subfolders where you keep information about your mortgage loan, property valuation, interior repairs, exterior repairs, and a master contact listing.    For example, we had our roof replaced a few years ago, and keep the related information in a spreadsheet that I can pull up quickly along with the details such as roofer contact name and address, date of replacement, amount paid, warranty information, model, color and shingle type, etc.  This spreadsheet is kept in the EXTERIOR folder under the HOME folder.    Under the INSURANCE file, you might have subfolders for types of insurance and related information such as policy and contact information stored.  

Create organized electronic folders which are applicable to your life.   Some other subfolder examples might be Child Care, Scholarships, Social Security, Student Loans, Vacations.    For quick access, keep copies of bank statements, financial worth, credit statements, mortgage and car loan information, check register, monthly bills and other self-created spreadsheets electronically organized folders.   What about documents that you don’t have electronically, should you consider scanning them into your files?     I’ll talk more about this in week 5’s post on Paper files or Scanned files? 

Up next week #4: Keeping track of bills and creating a file system for paid bills.

If you like this post, please share and subscribe

Get Organized! Week Two

It’s Time to Get Organized!   Create a financial binder to keep important papers all in one place.   The binder is a quick way to help you pay attention to your finances on a regular basis. Keeping files electronically is great, but sometimes it is nice to just grab a binder and flip to the page you need!

We get what seems like a million pieces of paper each year.   It is easy to get overwhelmed by the piles of paperwork on the counter.   One of my quick go to methods to organize papers is to use three ring binders.   There are several products I use and love and I am linking them below, but you can use what you have on hand or keep an eye out for sales.

I put together three ring binders for many areas of my life.   Binders are cheap and I buy them whenever I see them on sale.   At a yard sale or thrift store they often go for as little as fifty cents each.  I mainly use all white binders because I prefer the clean look and can dress them up with a slip-in cover page.   You can create binders for many areas such as:  health files divided by each person in your house, a binder for pets with all their records, one for each grade level of your children, a family emergency binder, kitchen recipes, warranties and manuals, vacations, and a binder for financial papers.     For the financial binder, start with a 1 ½ ”or 2” binder that has a slip in cover page where you can insert a copy of your emergency savings tree printable or your index or any cover page.    

In addition to a three-ring binder, I use the tabs numbered 1 to 10 (you can buy tabs in more or less numbered versions).   Get these at an office supply store or Amazon. Right now Amazon has a great sale to buy 6 sets for under $10, and once you make this binder, you will want to make other binders!   These numbered tabs come with a handy index page that you can write or type on, or use a label maker (I love my brother p-touch label maker, it often goes on sale near Christmas and back-to-school time) But I often just use a spreadsheet to create my own index page. Some examples of categories you might use to label the index page of your tabs are below.

Grab this free printable for the index page above!

If using these tabs for your financial documents binder, below are a few financial papers to place behind each tab. I will be writing about many of these items in the coming months, so if you don’t have them now or know what they are, stay tuned.      

Tab 1, a copy of your overall financial net worth statement

Tab 2, a printout of your monthly budget plan

Tab 3, a listing and detail of all your debt and your debt snowball plan 

Tab 4, print out copies of your 401K quarterly statements

Tab 5, sign up at ssa.gov for your annual social security report and put the most recent copy in the binder every year 

Tab 6, any bank or investment records

Tab 7, a copy of all your insurance policies:   Car, Home, Life, etc.  

Tab 8, a few of your recent pay stubs, and your most recent year end W-2 statement 

Tab 9, is for any important information such as a list of all credit cards, bank information, mortgage information and contact information for all your financial accounts to name a few

Behind tab 10, your most recent credit reports 

As you make this book, you may have different or additional categories to add based on the financial papers in your box from week one’s post. I have college funds for my children, and I might add a tab for college planning.   As your binder gets too thick, transfer some older papers out of the book into an archive binder or start a new separate book.   For example, a spinoff binder might be for retirement planning only.    

I also like to place a business card sleeve in the front of my binder to slide in any business cards of financial contacts you might have such as a bank manager, an investment broker, a mortgage company, etc.    Additionally, I always have a few of these plastic sleeves in case I don’t want to hole punch a paper, or if the paper is a different size than your binder and you need to fold it.  

Once you have your binder, tabs, and index sheet, grab a three hole punch, go through your financial records and start placing documents behind the appropriate tab.    Make this financial binder work for your personal situation; it will continue to evolve over the years.  I like to finish my book off with a label on the spine.   Always place your labels on so that when the binder lays flat, you can read the label.    

I keep these binders in a dish rack like this one to keep them standing upright, in my home office, or on a nearby bookshelf.   You want them to be handy so that you can grab them at a moment’s notice to look up a loan number, see what the debt snowball looks like, or get a phone number for your mortgage company.   

Keep any important papers in your financial binder to have them all in one place.   It makes for quick and easy access of your finances.  As you begin using the financial binder, you look at and pay attention to your finances more often. Keeping files electronically is great, but sometimes it is nice to just grab a binder and flip to what you need!   

Disclosure: If you purchase anything from links in this post or other Jump Rope Finances blog posts, I may receive an affiliate commission. However, I only ever mention products I love and would recommend whether I was being compensated or not. Thank you so much for your support of Jump Rope Finances.


If you like this post, please share and subscribe!

Get Organized! Week One

It’s Time to Get Organized!  Create several systems to keep track of your financial paperwork.    There are many systems out there, from file folders to financial binders to digital organization.    Try a few out and see what works best for you on a consistent basis.  Areas to organize include paper bills, electronic bills, long term paperwork & general financial life organization.   

The Scoop:  We get what seems like a million pieces of paper each year.   It’s easy to get overwhelmed by the piles of paperwork that accumulate all throughout the house.   So, for the next few weeks, I hope to post once a week to help you get organized.    Take what you like, and leave the rest, but keep checking back weekly.  

Week One:      Gather your financial papers

Week Two:      A Financial Binder

Week Three:  An Electronic Organized system

Week Four:     Keeping track of bills and a file system for paid bills

Week Five:      Papers files or Scanned files?

Week Six:        Create a lock box of important documents

Week One:  For this week, start by finding a cardboard box and begin pulling together all your financial papers and records in one place.  Just open the box and toss in the information.  Having it all in one box rather than scattered around the house will help in the next few weeks putting together a financial binder and organizing system.    If you have all your documents electronically, start pulling them all together in one file folder on your computer called Finances, plus the current year.   Example “Finances 2020”.  

A quick list of items that come to mind are: 

  • Copies of your tax returns
  • Bank statements & credit card statements
  • Insurance policies (car, home, life, health, etc)
  • Last Will and Testament, Living Wills and relating documents
  • Pension, 401K, Retirement and Social Security statements
  • Paycheck Stubs and work related files
  • Investment account statements & related papers
  • Credit Reports
  • Outstanding Loan documents
  • Lease or mortgage information

Pull together things that you know you should keep in a safe place and that you could get your hands on in ten minutes if needed.

Up next, creating a financial binder. 

 Stay up to date with weekly organizing posts, by subscribing below.